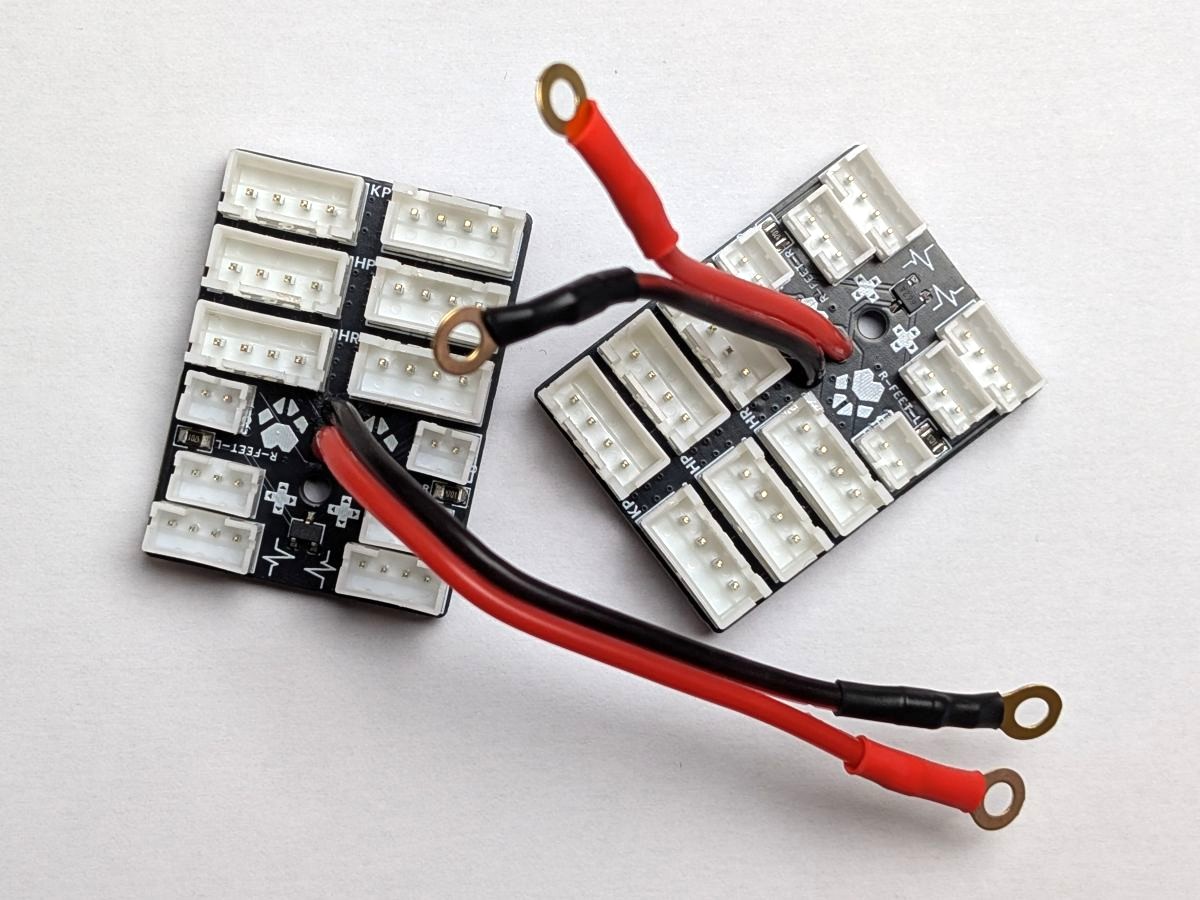
The Paw Boards Wires
The Paw Boards distribute power to the motors, so they need two beefy wires to get that power from the DC-DC Buck Converter !
The Paw Boards have two holes for wires to be soldered into.
These wires will carry all the current for the motors, so they need to be thick enough to handle that current without overheating.
We recommend using 18 AWG wire for this purpose, as they are thick enough to handle the current, but still flexible enough to work with.
The connections
Since the Paw Boards are already filled with connectors and other components, we couldn't write the polarity of the wires on the PCB itself, so here's which wire goes where:
The ground wire (which is usually black) should be soldered to the hole closest to big connectors (the ones for the motors).
The power wire (which is usually red) should be soldered to the hole closest to the small connectors (where the screw hole is).
Use the picture as reference if you're not sure which wire goes where !
The length of the wires
You may have noticed that the cables for the two boards don't have the same length.
This is because the front paw board is further away from the buck converter than the rear paw board, so it needs a longer
wire to reach it.
Here's the recommended length for each wire:
- The front paw board: Around 5cm of wire, since this board is next to the buck converter.
- The rear paw board: Around 9cm of wire, because this board is located a bit further away from the buck converter.
Don't cut too short!
If you are not sure about the length of the wires, it's better to have them a bit longer than too short, since you can always trim them down if they are too long, but you can't make them longer if they are too short !
Crimp the ring terminals
Th DC-DC Buck Converter has screw terminals. This type of terminal uses a screw to clamp down on the wire, so they need a ring at the end to be secured properly.
Use two M3 ring terminals, and crimp them at the end of the wires. This will allow you to screw the wires into the buck converter without worrying about them coming loose.
Use heat shrink tubing to protect the connections between the wires and the ring terminals, and to prevent any short circuits.

Put the heat shrink tubing before crimping!
Make sure to put the heat shrink tubing on the wires before crimping the ring terminals, since you won't be able to put it on after crimping.
If you never crimped ring terminals before, don't worry, it's really easy (with the right tool) !
This 1-minute video will show you how to do it, and if you have any questions, feel free to ask in the community server !
Okay, let's prepare the last wires for the Power Board now !