The Back
Let's start the heat insert process with the back part of the robot. This is the part that hosts the Power Board.
This is a simple yet important part of the robot that will be the best candidate to practice placing heat inserts for the first time, before moving on to more complex parts like the torso and legs.
Sizes and placements
For this part, you'll need these heat inserts:
| ID | Size | Description | Quantity |
|---|---|---|---|
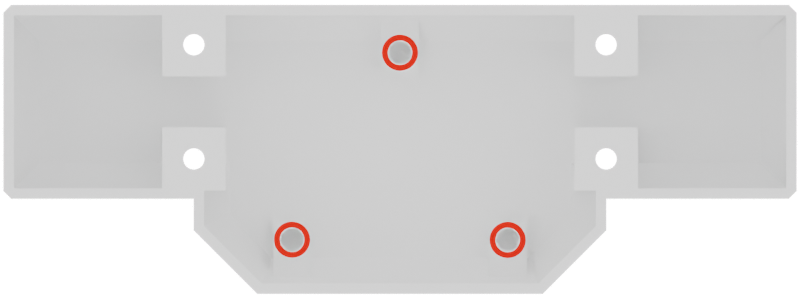
| 1 | M2.5 x 2mm | PCB Mounting Holes | 3 |
Placing the heat inserts
Place the heat inserts as described in the Heat Inserts Guide, making sure to place them in the correct holes as indicated in the image above.
Final inspection
After placing the heat inserts, make sure to inspect the part to check that all the inserts are properly seated and flush with the surface of the part.
If you notice any issues, such as an insert that is not fully seated or is tilted, you can try to reheat it and adjust its position until it is properly placed.
Satisfied with the result ? Good ! Let's move on to the next part of the robot !