The Torso - Bottom
The bottom of the torso is the core of the robot, where all the main components are mounted and connected.
Since this part has a lot of heat inserts to place, we will break down the process into 2 steps to make it easier to follow and ensure that all the inserts are placed correctly.
PCB Mounting Holes
First we'll place the heat inserts for the PCB mounting holes. These are the holes where the Motor Driver, Analog Reader and other PCBs will be mounted.
For this step, you'll need these heat inserts:
| ID | Size | Description | Quantity |
|---|---|---|---|
| 1 | M2.5 x 2mm | PCB Mounting Holes | 12 |
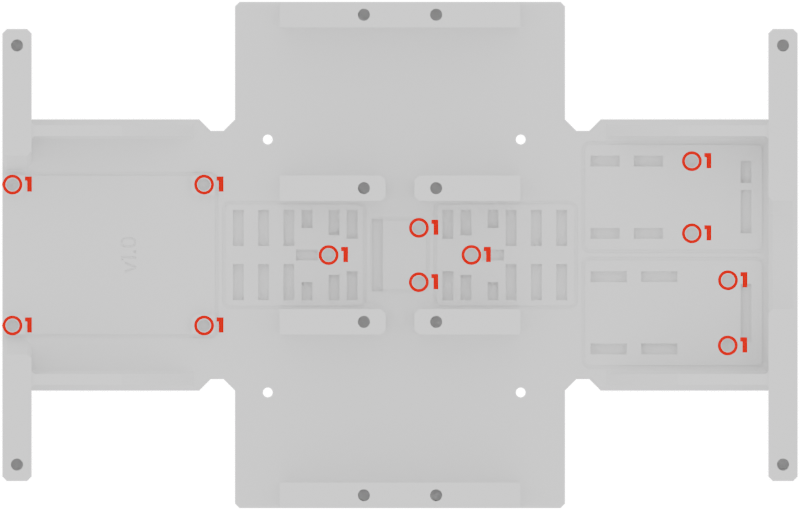
Make sure the inserts are flush with the surface of the part, as the PCBs will be mounted directly on top of them.
Parts Mounting Holes
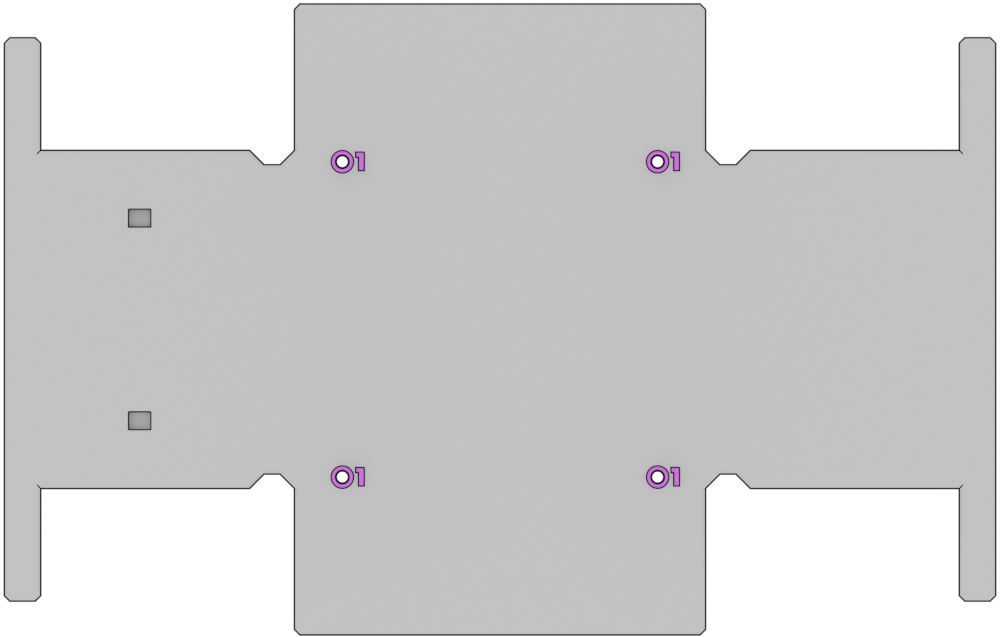
Next, we'll place the heat inserts used for mounting other parts to the torso, such as the Torso - Top, the Head, the Back, and the Battery Base.
For this step, you'll need these heat inserts:
| ID | Size | Description | Quantity |
|---|---|---|---|
| 1 | M2.5 x 2mm | Battery Mounting Holes | 4 |
| 2 | M2.5 x 4mm | Front & Back Holes | 8 |
| 3 | M2.5 x 6mm | Torso - Top Holes | 12 |

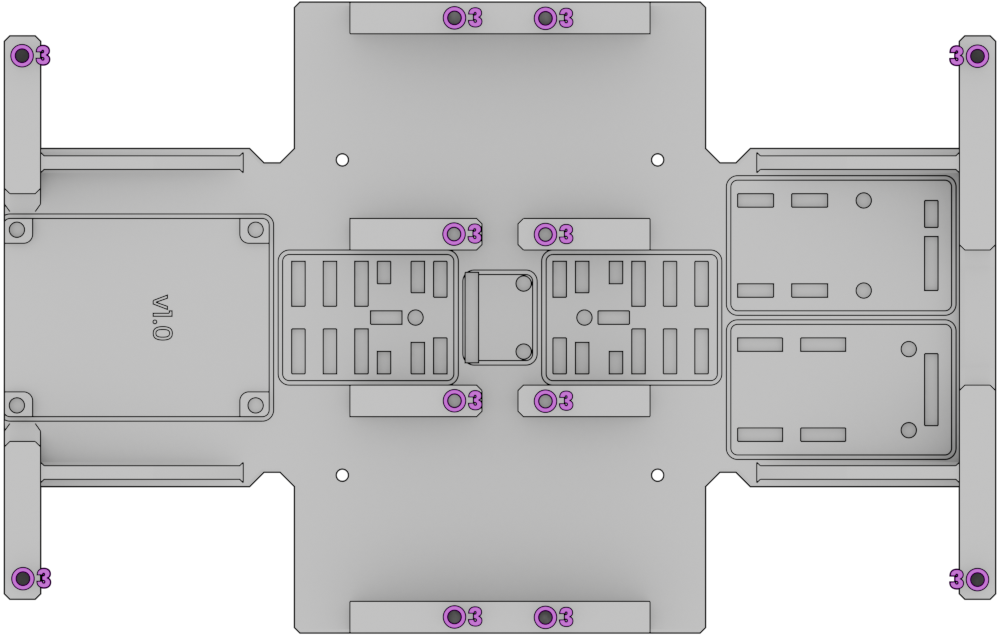
These inserts will experience more stress. So make sure to place them carefully and ensure they are properly seated and flush with the surface of the part to provide a strong and secure mounting point for the other parts.
Final inspection
After placing the heat inserts, make sure to inspect the part to check that all the inserts are properly seated and flush with the surface of the part.
If you notice any issues, such as an insert that is not fully seated or is tilted, you can try to reheat it and adjust its position until it is properly placed.
That's it for the bottom of the torso ! Let's move on to the next part now :)